Getting Started
Generate data for an empty database
In order to quickly make yourself familiar with TDK and its features without getting access to production-scale database servers, you can use our demo project based on Docker Compose. It comes with two preconfigured PostgreSQL instances, a Pagila database schema and TDK.
To run this demo, you need the following to be installed on your machine:
Run the following commands:
git clone https://github.com/synthesized-io/tdk-demo
cd tdk-demo/postgres
export CONFIG_FILE=config_generation_from_scratch.tdk.yaml
docker-compose run tdk_admin|
In this and following examples, if Windows operating system is used, |
This will spin up two PostgreSQL instances and pgAdmin in containers and run a TDK transformation defined in the config_generation_from_scratch.tdk.yaml file from the tdk-docker-demo folder. The docker-compose run tdk command will take some time to complete the data generation process. Once it finishes, the two database instances will be available to connect to and browse the data.
After that, we can connect to the output database using thе following credentials:
-
navigate to http://localhost:8888
-
navigate to
output_db, provide passwordpostgreswhen asked
and examine the schema and generated data.
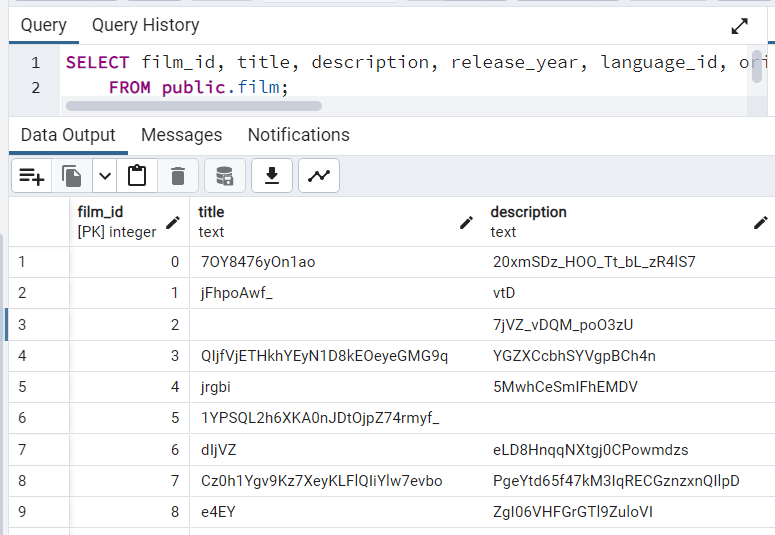
For example, the film table will look like following:

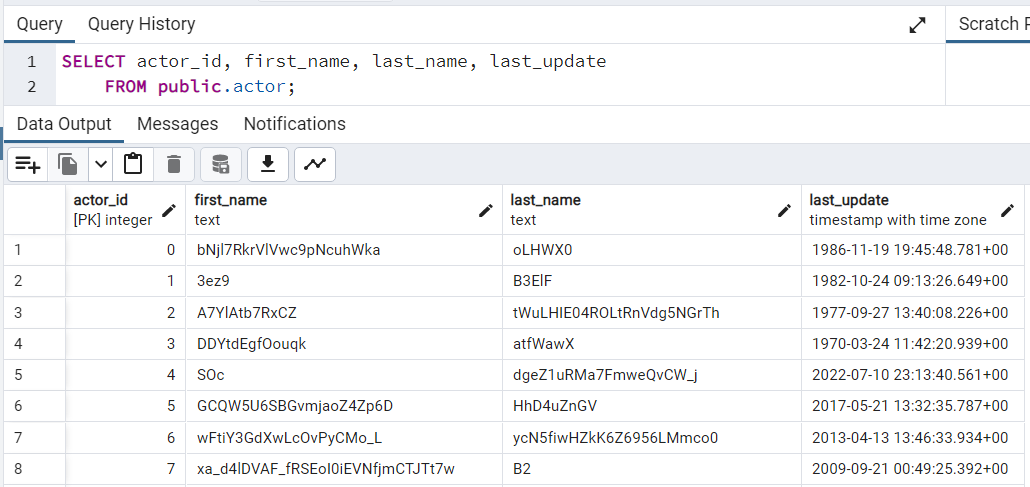
The actor table content will look like this:

As we can see, first_name and last_name fields contain random strings that don’t look like names of people. We can improve the configuration and make it use person_generator. To do this, add the following to the tables section of the config_generation_from_scratch.tdk.yaml file from the pagila-tdk-demo folder:
  - table_name_with_schema: "public.actor"
    transformations:
      - columns:
          - "first_name"
          - "last_name"
        params:
          type: "person_generator"
          column_templates:
            - "${first_name}"
            - "${last_name}"
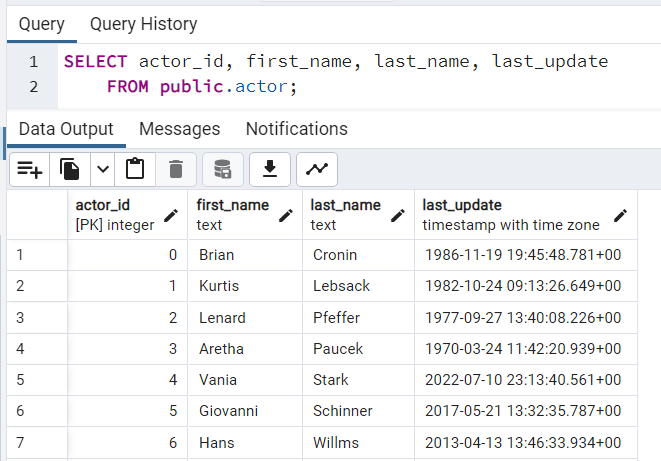
Run docker-compose run tdk again and re-query the data from actor table. You will see more realistic names for actors:

Congratulations on completing your first data transformations using Synthesized TDK! You can now proceed with experiments using various configurations and databases.
Mask data
Data masking is a technique used to hide sensitive or confidential information in a database by replacing it with fictitious but realistic data. This is done to protect the privacy of individuals and organizations whose data is stored in the database.
You can use the following commands to mask the existing data in an example Pagila database:
docker-compose down
export CONFIG_FILE=config_masking.tdk.yaml
docker-compose -f docker-compose.yaml -f docker-compose-input-db.yaml run tdk_admin
The input database server is available in pgAdmin as input_db, the password is still postgres. Compare the content of input and output database tables to see how masking works. You can modify config_masking.tdk.yaml configuration to fine tune your masking script.
You can find out more about masking in Masking tutorial.
Generate data
Sometimes we need to inflate the database with additional records. This may be necessary for various scenarios, such as load testing, development, debugging, etc., when the available amount of data is insufficient.
The following example doubles the number of records in the Pagila database:
docker-compose down
export CONFIG_FILE=config_generation.tdk.yaml
docker-compose -f docker-compose.yaml -f docker-compose-input-db.yaml run tdk_admin
You can compare input and output databases by browsing input_db and output_db in pgAdmin at http://localhost:8888, respectively.
You can find out more about data generation in Generation tutorial.
Subset data
If the available database is too large, we may want to reduce its size by taking a subset of records in order to speed up development and testing.
The following example demonstrates how to subset the Pagila database:
docker-compose down
export CONFIG_FILE=config_subsetting.tdk.yaml
docker-compose -f docker-compose.yaml -f docker-compose-input-db.yaml run tdk_admin
As usual, input database is available as input_db, and output database is output_db in pgAdmin at http://localhost:8888.
More about subsetting is in Subsetting tutorial.