CSV Support
Synthesized supports transforming CSV files using either the CLI or web interface.
Storage Options
-
Local Files: Use CLI only
-
S3 Storage: Use CLI or web interface
| The web interface only works with S3 storage. For local CSV files, use the CLI. |
File Structure Requirements
CSV files must be organized in a specific directory structure. Each directory represents a table, and all files within a directory should have the same schema.
Organize your CSV files in directories by table:
my-bucket/my-input-dir/     # For S3 storage
├── orders/
│   ├── orders1.csv
│   └── orders2.csv
├── products/
│   └── products1.csv
└── users/
    └── users1.csv
The output directory must be empty at the start of transformation. After completion, it will have the same structure with one data.csv file per table:
my-bucket/my-output-dir/
├── orders/
│   └── data.csv
├── products/
│   └── data.csv
└── users/
    └── data.csv
File Format
Synthesized expects CSV files with:
-
First row as header
-
Comma-separated values
-
Quote character:
" -
Empty strings treated as nulls
Configuration
CSV transformations use the same configuration as database transformations. Schema name must be public because CSV data is internally processed as tables in a temporary database structure where all tables are created in the public schema namespace:
default_config:
  mode: MASKING
safety_mode: STRICT
schema_creation_mode: DO_NOT_CREATE

tables:
   - table_name_with_schema: "public.orders"
     target_ratio: 0.98

   - table_name_with_schema: "public.products"
     mode: GENERATION
     target_row_number: 100

   - table_name_with_schema: "public.users"
     mode: GENERATION
     target_ratio: 5
Usage
-
Synthesized Web Interface
-
Synthesized CLI
The web interface accepts CSV files stored in S3 compatible storage. It provides visual workflow management, monitoring, and scheduling capabilities.
Set up your S3 connection with endpoint, bucket, and credentials.
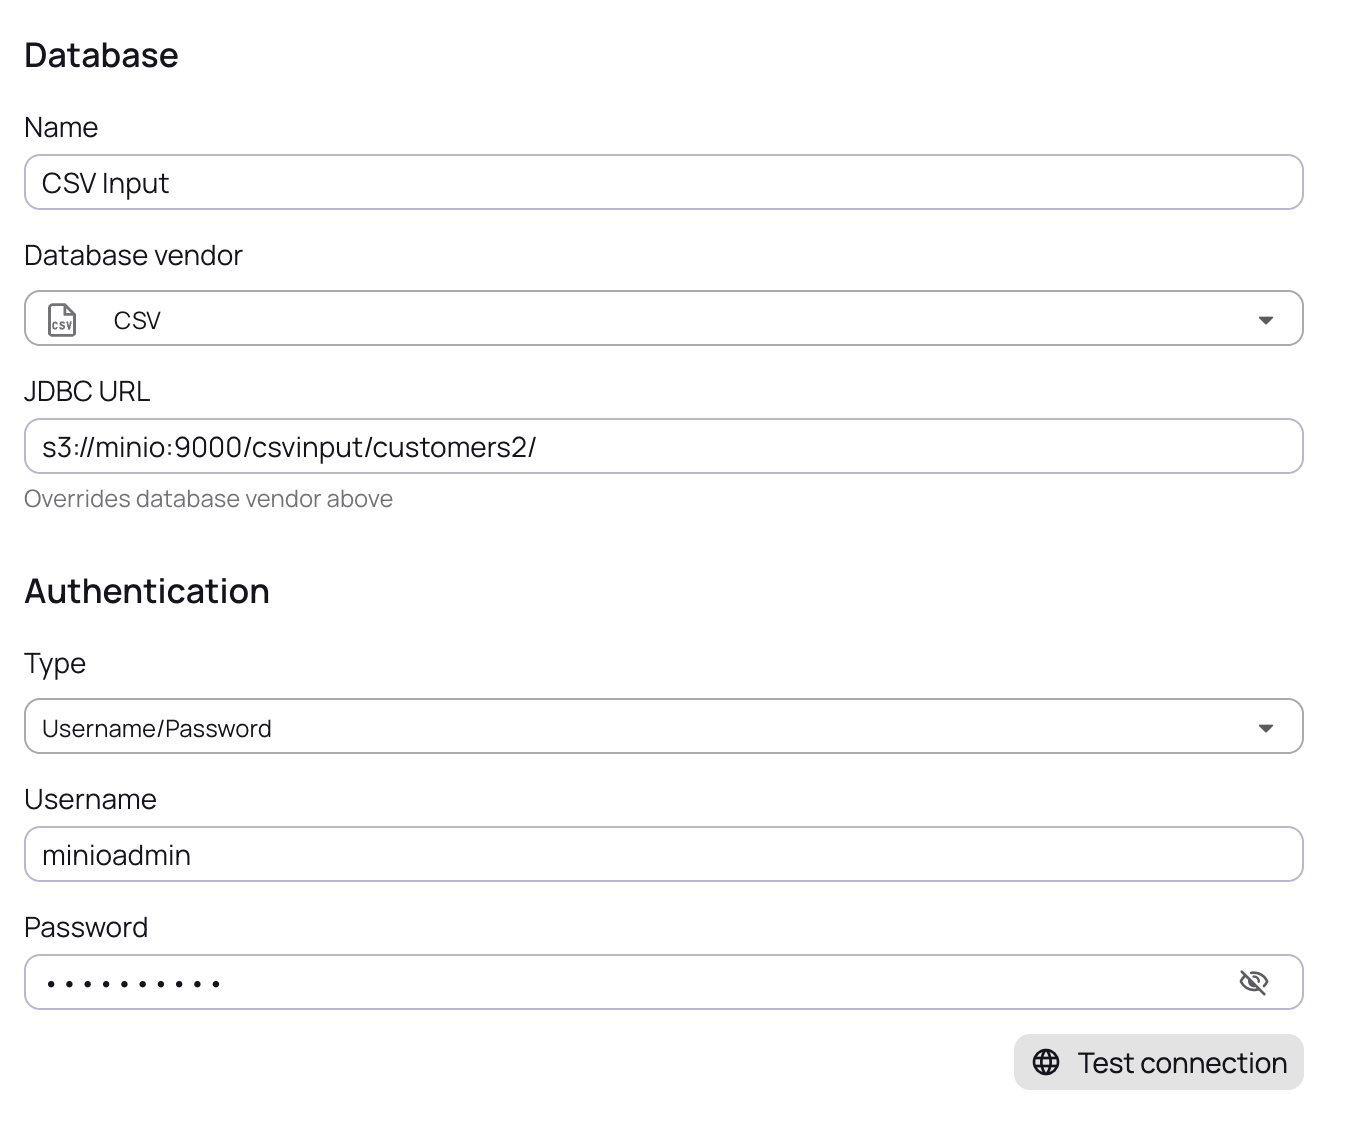
Input:
| The input JDBC URL should end with the Directory. |
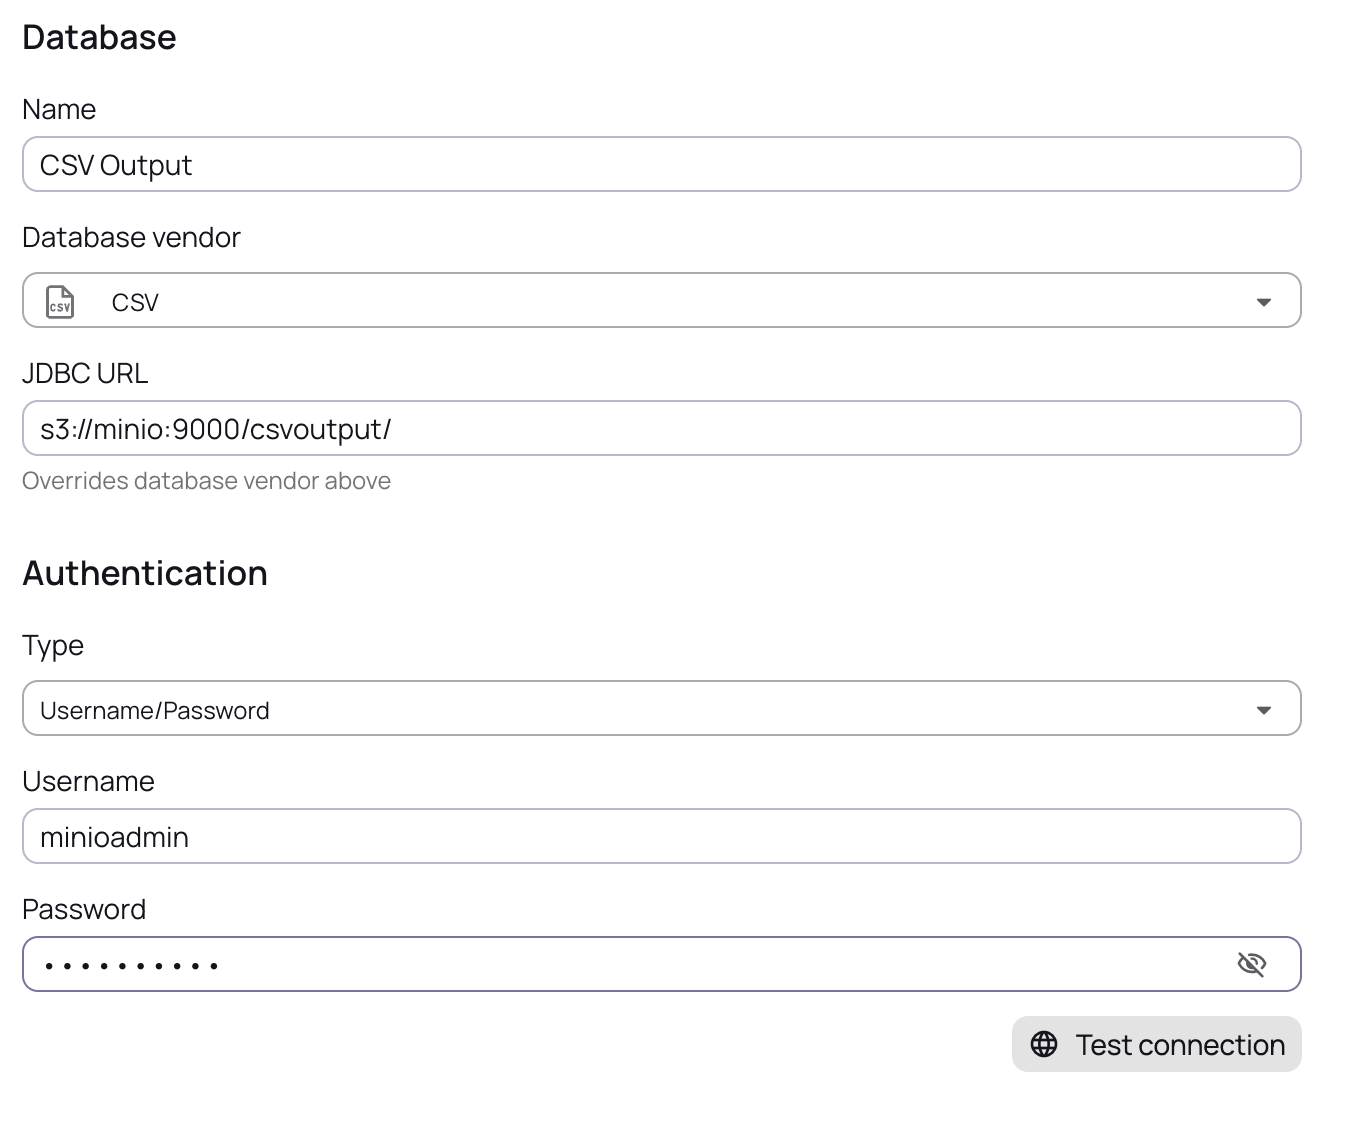
Output:
| The output JDBC URL should end with the Bucket. |
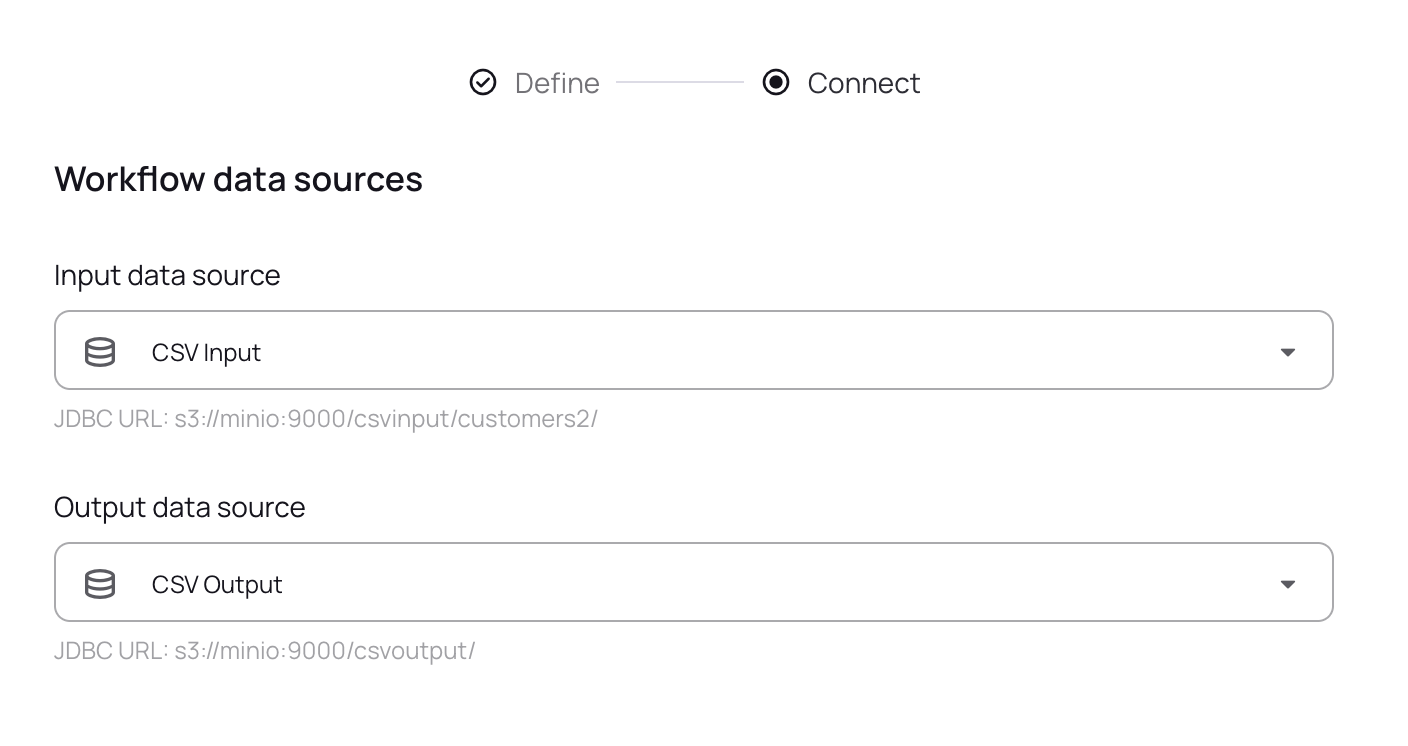
Create a new workflow and select your S3 data source.
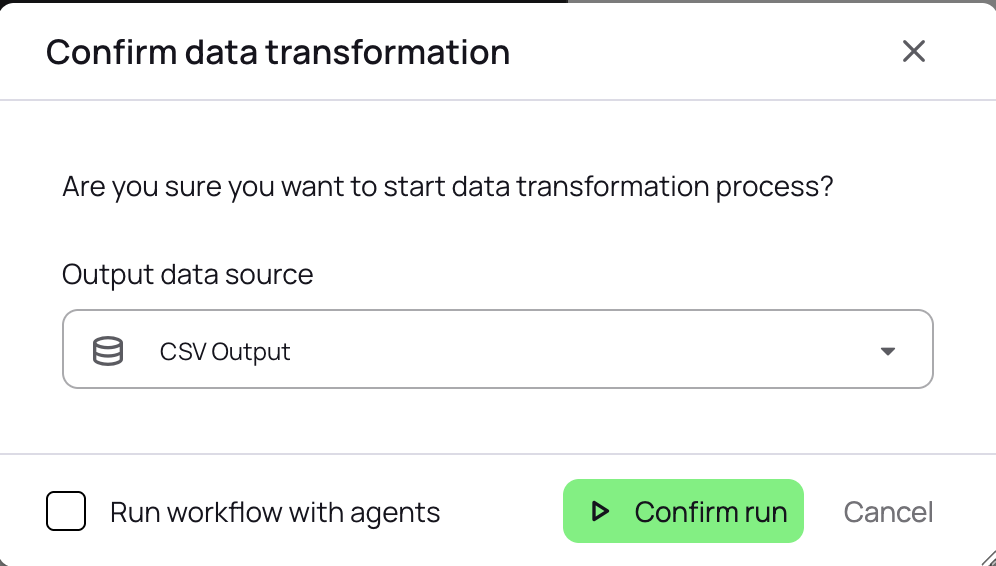
Configure and execute your workflow.
Make sure you leave the Run workflow with agents unchecked.
|
Execute your workflow and track progress.
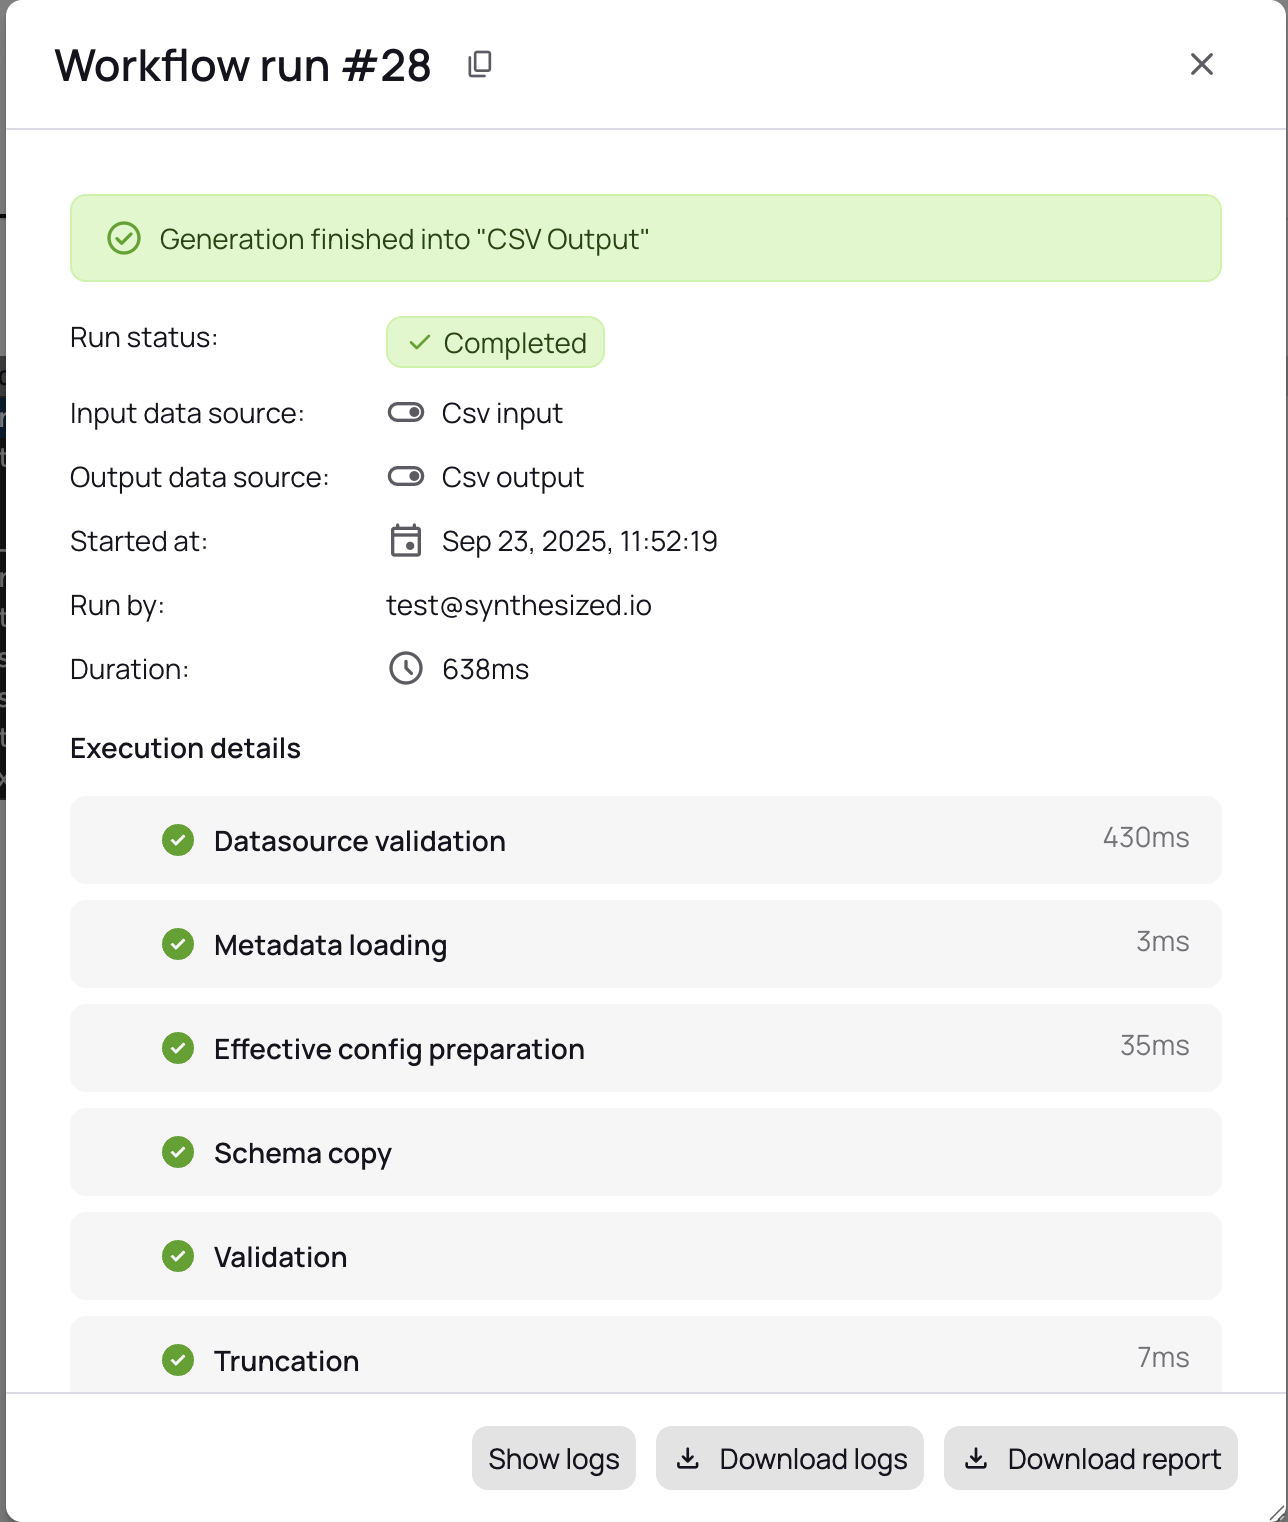
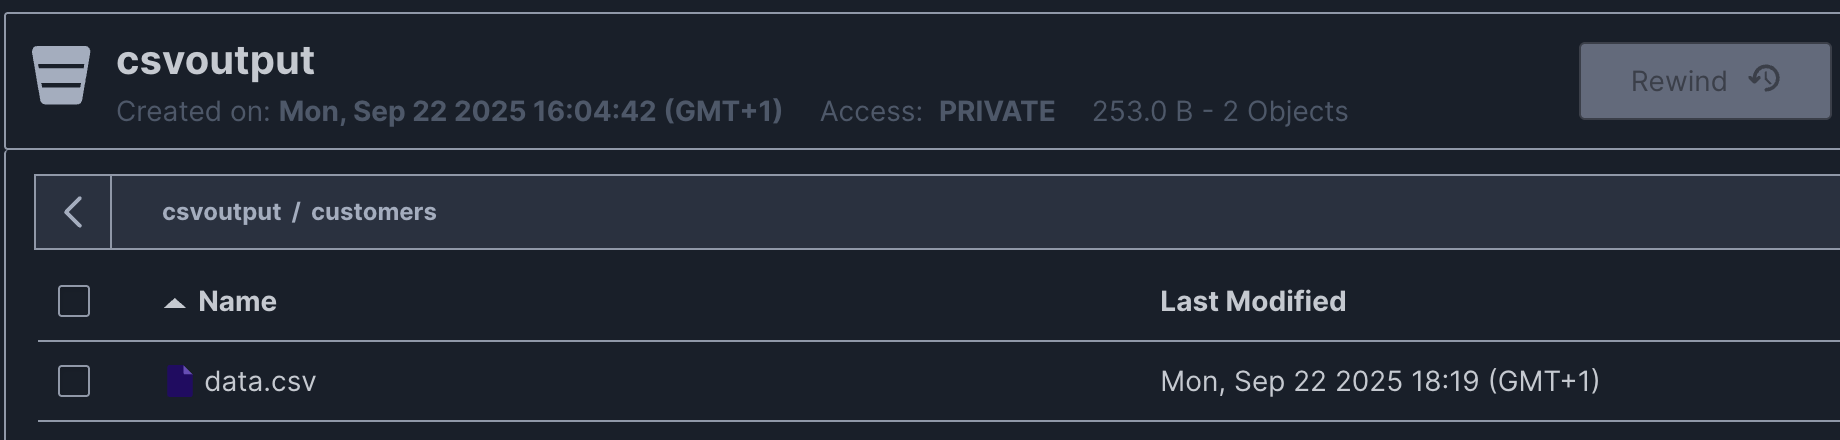
View results and access transformed files in S3.
Use the command line interface for both local files and S3 storage. Provides direct control and automation capabilities.
CSV transformations with local files require the working directory option to be enabled:
TDK_WORKINGDIRECTORY_ENABLED=true TDK_WORKINGDIRECTORY_PATH=/my-working-directory \
tdk -c config.yaml --input-url file:///my-input-dir/ --output-url file:///my-output-dir/For S3 storage, configure the S3 client with environment variables and provide credentials:
export TDK_WORKINGDIRECTORY_ENABLED=true
export TDK_WORKINGDIRECTORY_PATH=wd
export TDK_S3_REGION=eu-west-1

tdk -c config.yaml \
    --input-url=s3://s3.amazonaws.com/my-bucket/my-input-dir/ \
    --output-url=s3://s3.amazonaws.com/my-bucket/my-output-dir/ \
    --input-username='MY_AWS_ACCESS_KEY_ID' \
    --input-password='MY_AWS_SECRET_ACCESS_KEY' \
    --output-username='MY_AWS_ACCESS_KEY_ID' \
    --output-password='MY_AWS_SECRET_ACCESS_KEY'
S3 URLs use the format s3://<endpoint>/<bucket>/<directory>/. The implementation works with AWS S3, MinIO, and other S3-compatible services.
|