Adding Tables to a Workflow from the Database View
Add tables that the metadata scan missed, directly from the Database view.
Overview
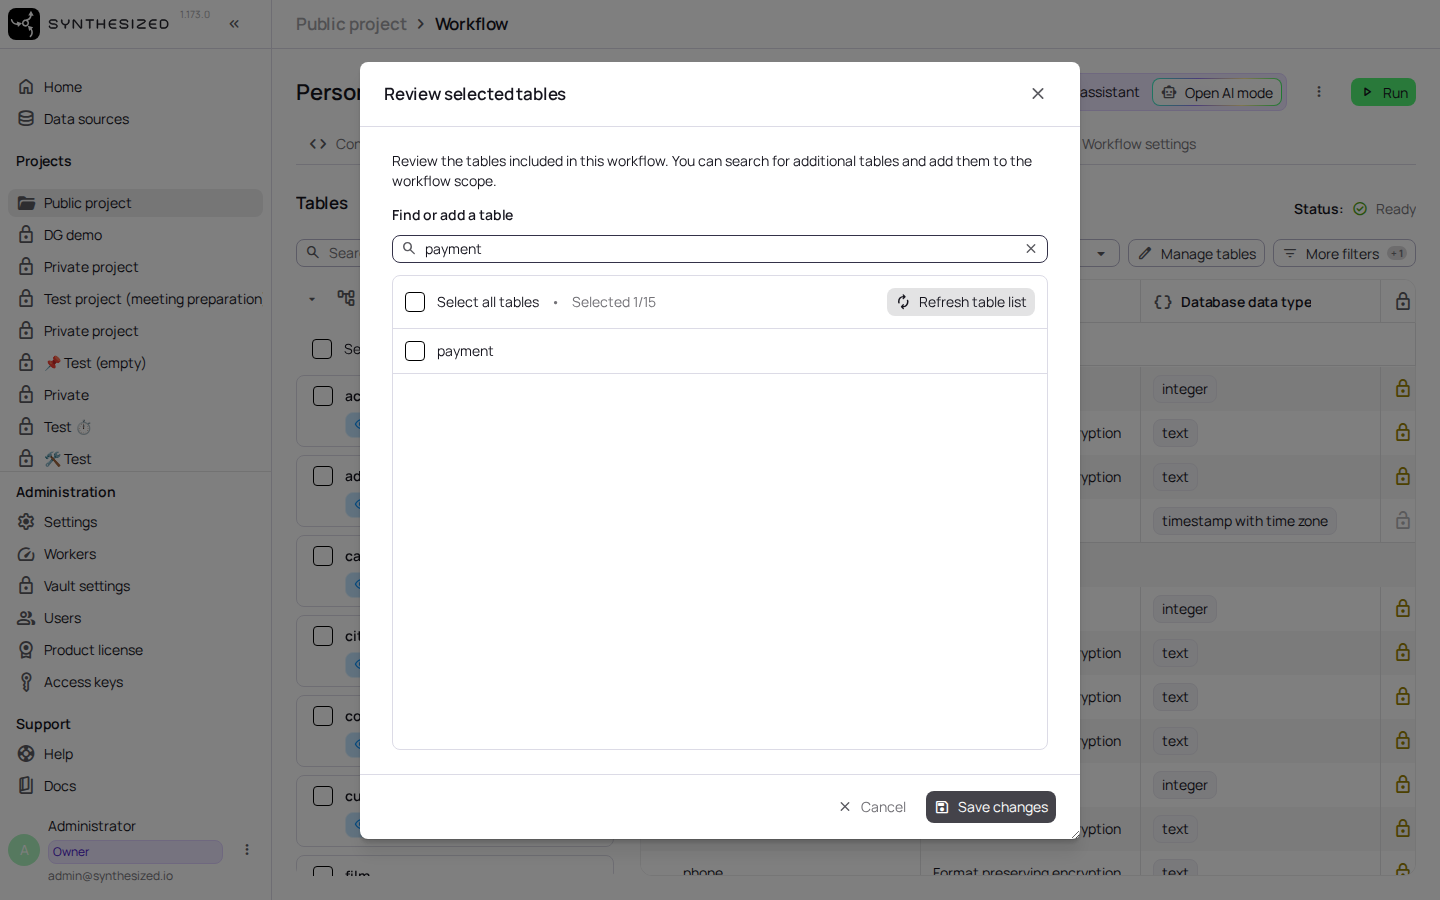
The Database view lists the tables a workflow’s metadata scan found in the connected database. Some tables may not appear because the scan never covered them. Manage tables lets you search the full table list from the database, tick tables to add, or type an exact table name to add one the scan does not list. Saving writes your selection into the workflow configuration and refreshes the scanned metadata, so the added tables then show up in the Database view like any other table.
Steps
-
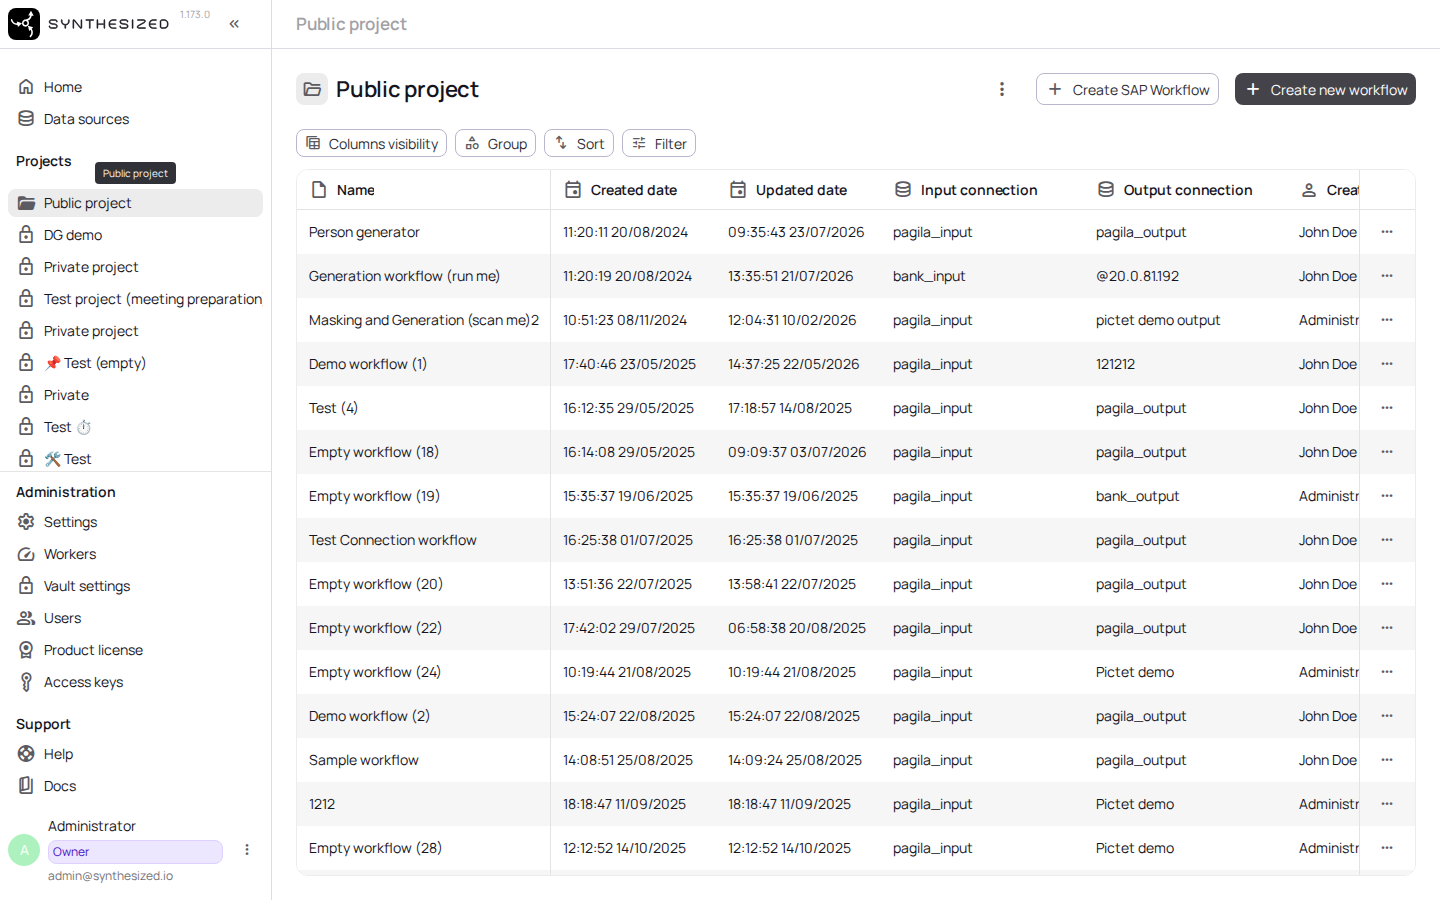
Open a workflow.
-
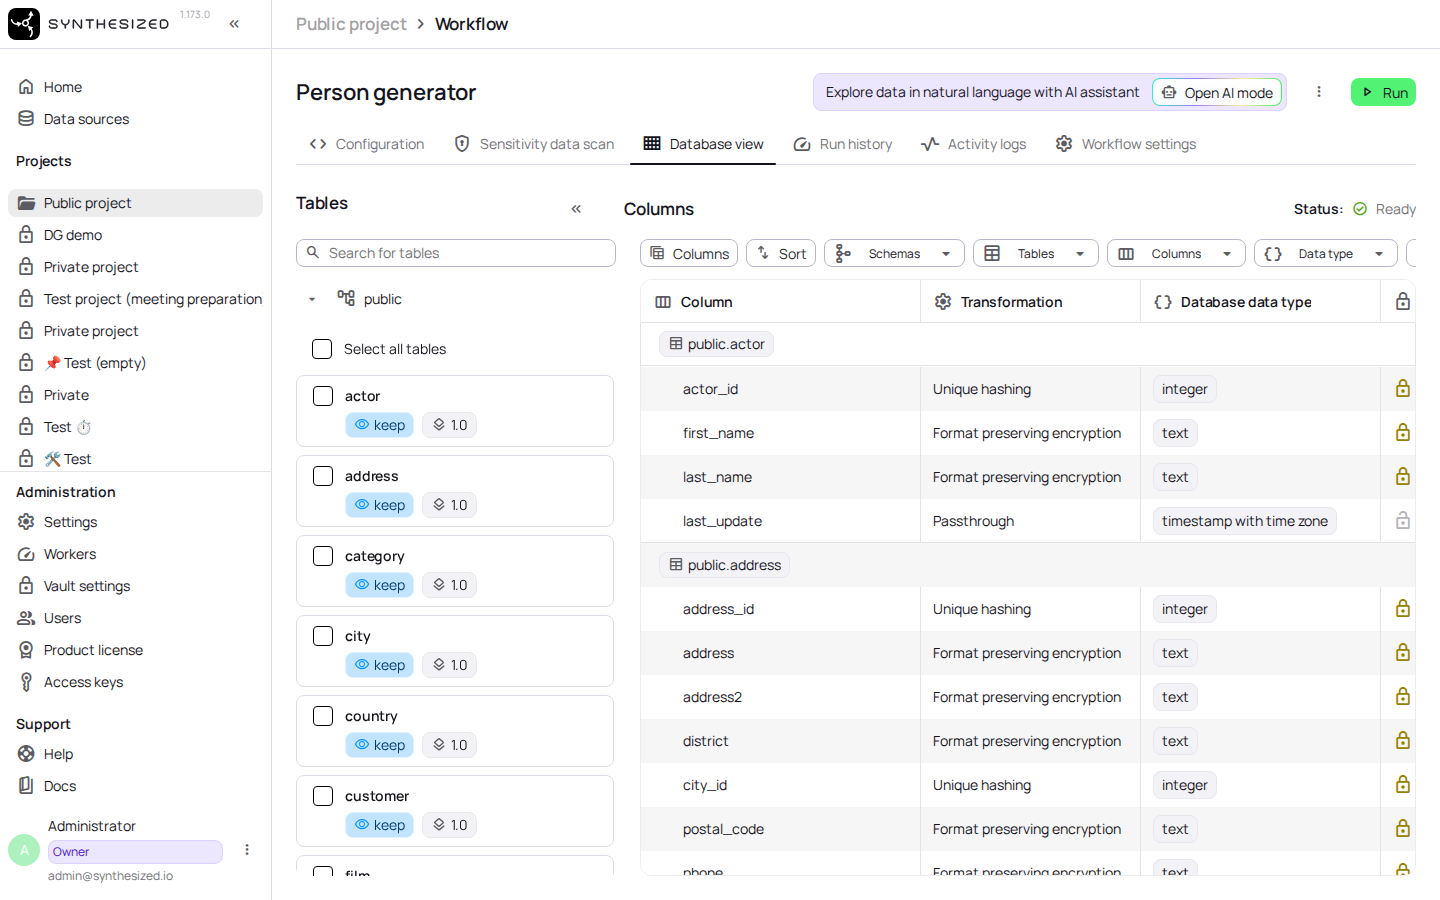
Go to the Database view.
-
Click Manage tables.
-
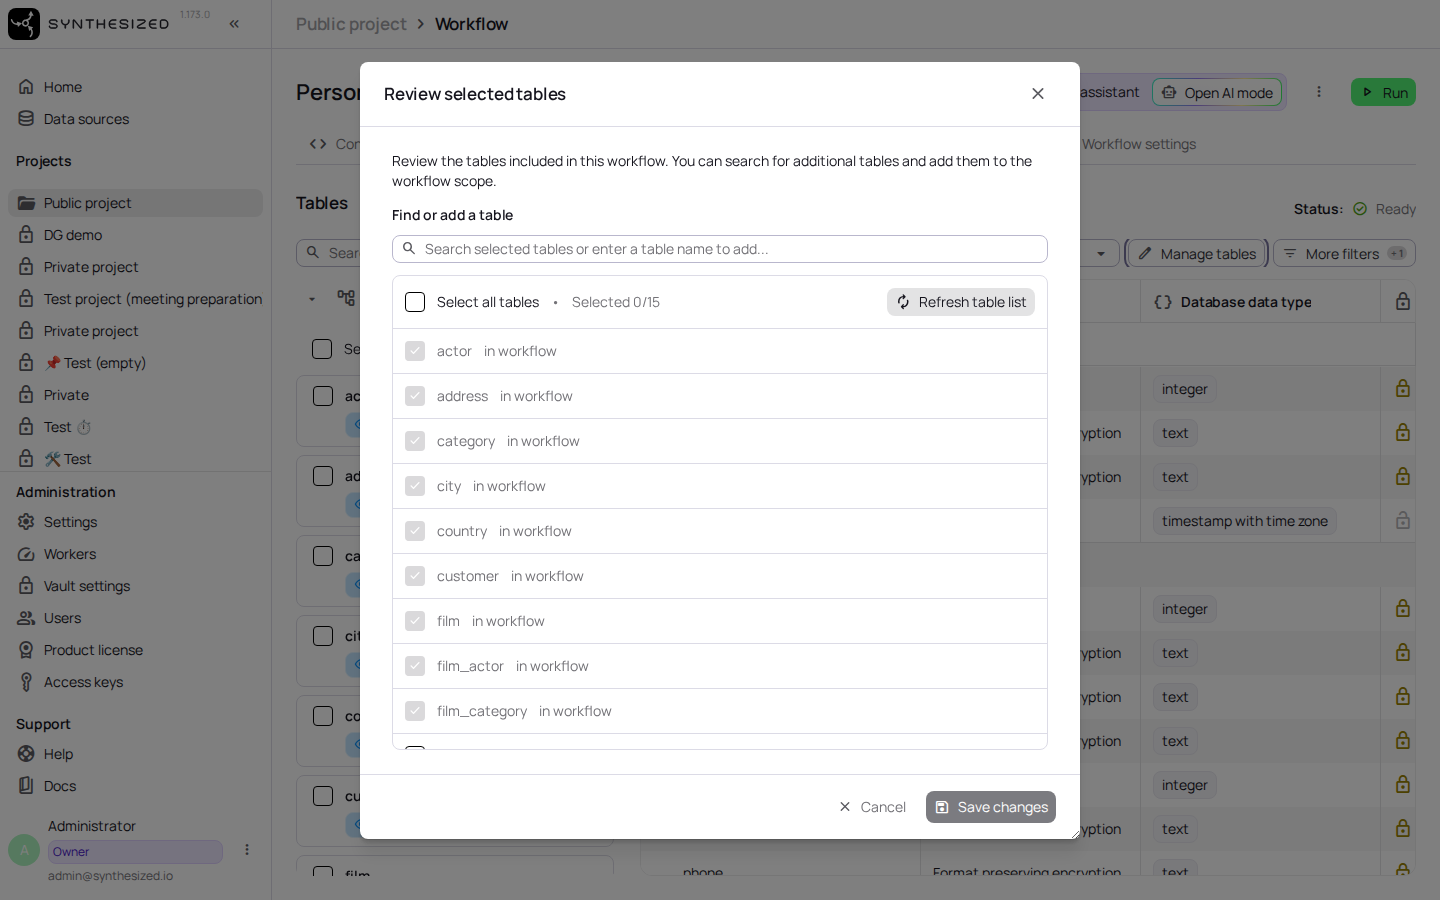
Search or page through the list of tables found in the connected database.
-
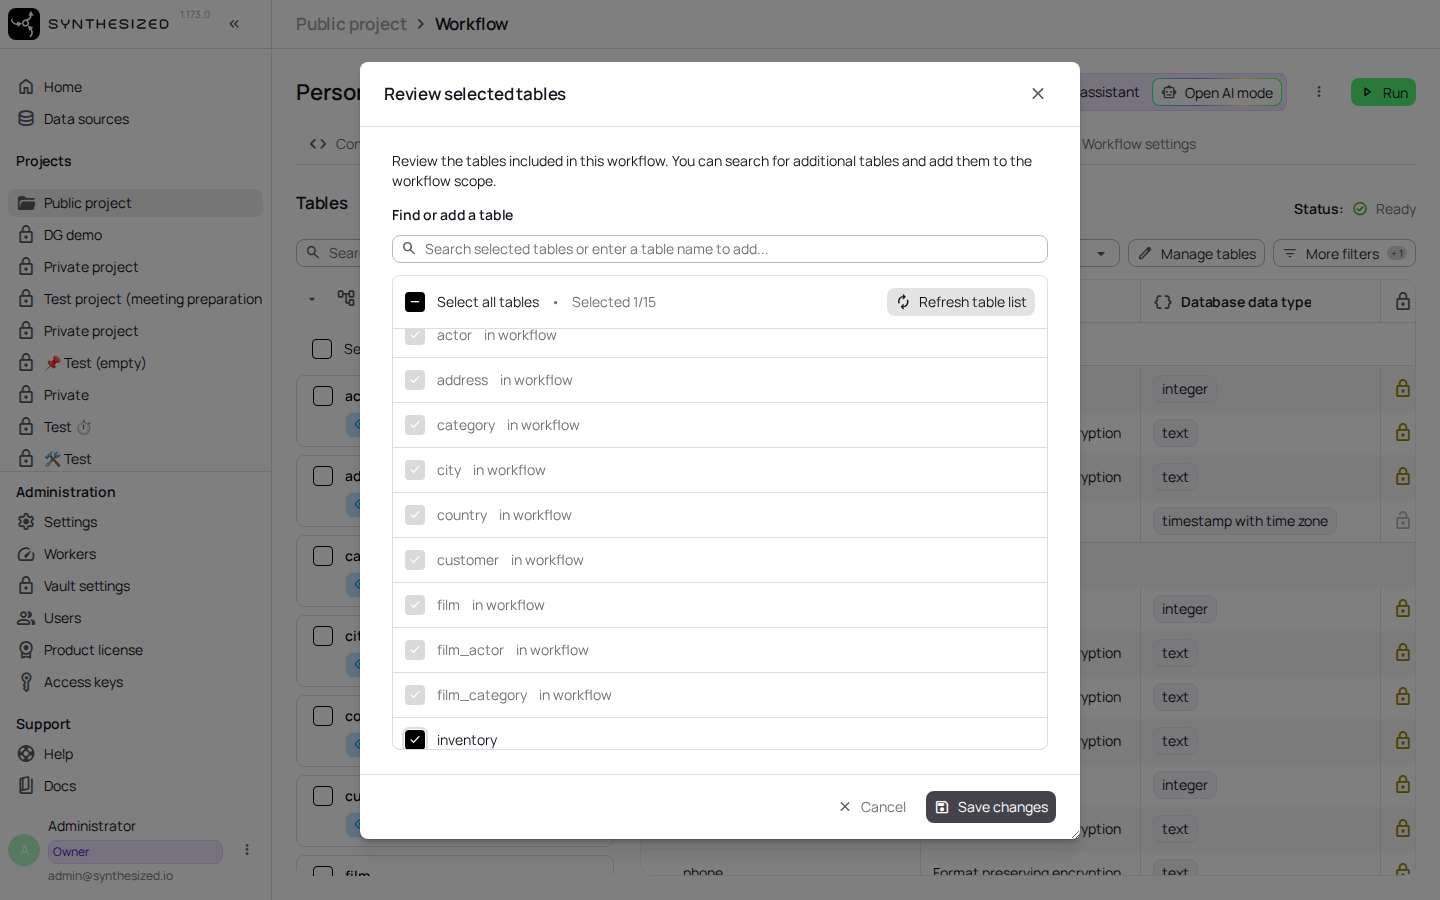
Tick the tables you want to add.
-
To add a table the list does not show, type its exact name instead of ticking it.
-
Click Save changes.
Tables already in the workflow configuration appear ticked and locked, so you cannot remove them from this dialog.
Confirm success
After saving, the Database view refreshes and the newly added tables appear in the list on their own, ready for masking or generation configuration.
Next steps
Configure the newly added tables — for example masking specific columns or setting up schema creation.